
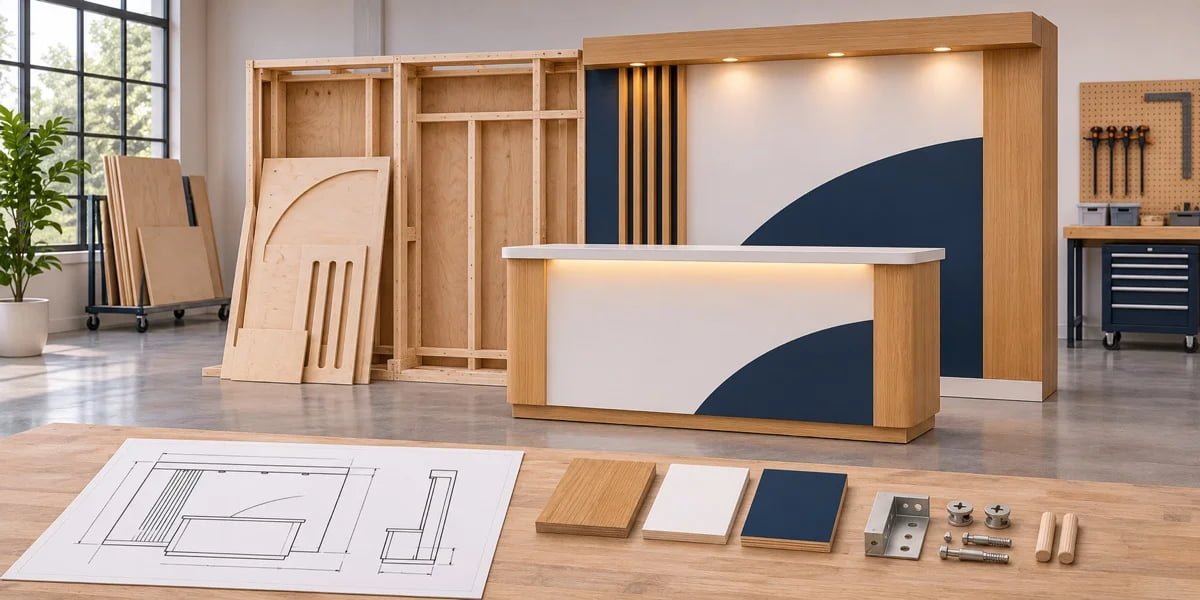
The custom booth fabrication process turns an approved design into components that can be built, checked, packed, and installed. The key is defining each production handoff before work begins, so materials, graphics, freight, and installation support the same plan.
At a glance: Review the design → develop shop drawings → fabricate components → finish surfaces → integrate graphics and AV → check assembly → pack and transport → install and dismantle.
These eight stages describe a project framework, not a list of services automatically included in every contract. Some tasks run in parallel, and rental or hybrid exhibits may use existing components alongside newly fabricated pieces.
What Is Custom Booth Fabrication?
Custom booth fabrication is the physical production of exhibit structures and display components to an agreed specification. It can include walls, counters, shelving, product fixtures, storage areas, branded features, and the provisions needed for graphics, lighting, and AV.
Design establishes the appearance and layout. Fabrication resolves how the pieces connect, what they are made from, how visible surfaces are finished, and how the exhibit travels and assembles. A rendering communicates intent; dimensions, specifications, samples, and production drawings define what will be built.
With our in-house fabrication facility in Las Vegas, Exhibitsmax manages custom woodworking, metal fabrication, finishing, graphics, and pre-show assembly as part of a coordinated exhibit production workflow. Our custom trade show booth fabrication service can connect this work with transportation and installation planning under the agreed scope. Confirm the actual deliverables before authorizing production.
The 8 Steps of Custom Booth Fabrication
Use these stages to understand what should happen and what your team needs to confirm. A useful production schedule assigns an owner and decision date to each handoff rather than simply listing a shipping date.
| Stage | Main Output | Confirm Before Moving Forward |
|---|---|---|
| 01. Design review | Agreed layout and technical requirements | Dimensions, display needs, scope, and show constraints |
| 02. Shop drawings and materials | Production details and finish selections | Current drawing revision, samples, and required approvals |
| 03. Fabrication | Specified structures and components | Connections, openings, support details, and component fit |
| 04. Surface finishing | Prepared and finished visible surfaces | Color, sheen, edges, seams, and handling protection |
| 05. Graphics and AV integration | Fitted graphics and equipment provisions | Artwork proofs, equipment sizes, access, and power locations |
| 06. Assembly and quality check | Agreed dry-fit or test assembly | Inspection coverage and closure of outstanding issues |
| 07. Packing and transportation | Labeled shipment and handoff documents | Inventory, protection, receiving route, and delivery window |
| 08. Installation and dismantling | Show-ready booth and outbound plan | Crew scope, service coordination, and return destination |
01. Design Review & Technical Planning
Start with the assigned booth footprint, open sides, products, functional zones, and current exhibitor manual. Review the concept against the target budget and the time available for approvals, production, receiving, and installation.
The review should identify questions that a rendering cannot answer: how a header connects, whether a shelf needs additional support, where equipment cables run, and how staff reach storage. Product dimensions, weights, and operating clearances need to be available before display details are finalized.
Separate design decisions from requirements needing specialist or organizer review. Structural documentation, hanging-sign permissions, and service restrictions depend on the proposed exhibit and event; they should not be inferred from booth size alone.
Your approval point: Confirm the layout, functional requirements, scope assumptions, and unresolved technical items. If the concept is still developing, involve the trade show booth design team before locking finishes or committing to production.
02. Shop Drawings & Material Selection
Translate the approved concept into the information the shop and installation crew need. Depending on scope, this can include dimensioned plans, elevations, component drawings, joint details, hardware locations, graphic sizes, and an assembly breakdown.
Select materials and finishes with transport and reuse in mind. A large wall may need smaller sections; a counter may need removable panels for cable access; a repeated-use exhibit may benefit from replaceable graphic faces. These decisions should appear in the production package rather than remain in email discussions.
Use samples or agreed references to confirm visible finishes. A wood-look rendering does not identify a particular wood species, laminate, or printed treatment. Document the actual selection and any permitted substitutions.
Your approval point: Review the latest drawing revision, material and finish schedule, and required approvals. Record which decisions are released for production and which remain open.
03. Wood & Metal Fabrication
Production turns the drawings into physical components. Work may include cutting and routing panels, assembling counters or wall sections, preparing shelving, and fabricating specified metal frames, brackets, or connections. CNC machining is one method for suitable components; not every part requires it.
Connection details matter as much as the visible shape. Hardware must be reachable during installation, removable panels must remain accessible, and components must fit within the packing and handling plan. Reinforcement for products or mounted equipment should follow the approved technical specification.
Check critical dimensions and mating parts while corrections are still practical. Discovering a misplaced monitor opening after graphics and finishing are complete can affect several later stages.
Your approval point: Resolve proposed changes to dimensions, materials, hardware, or display support before they become part of the finished build.
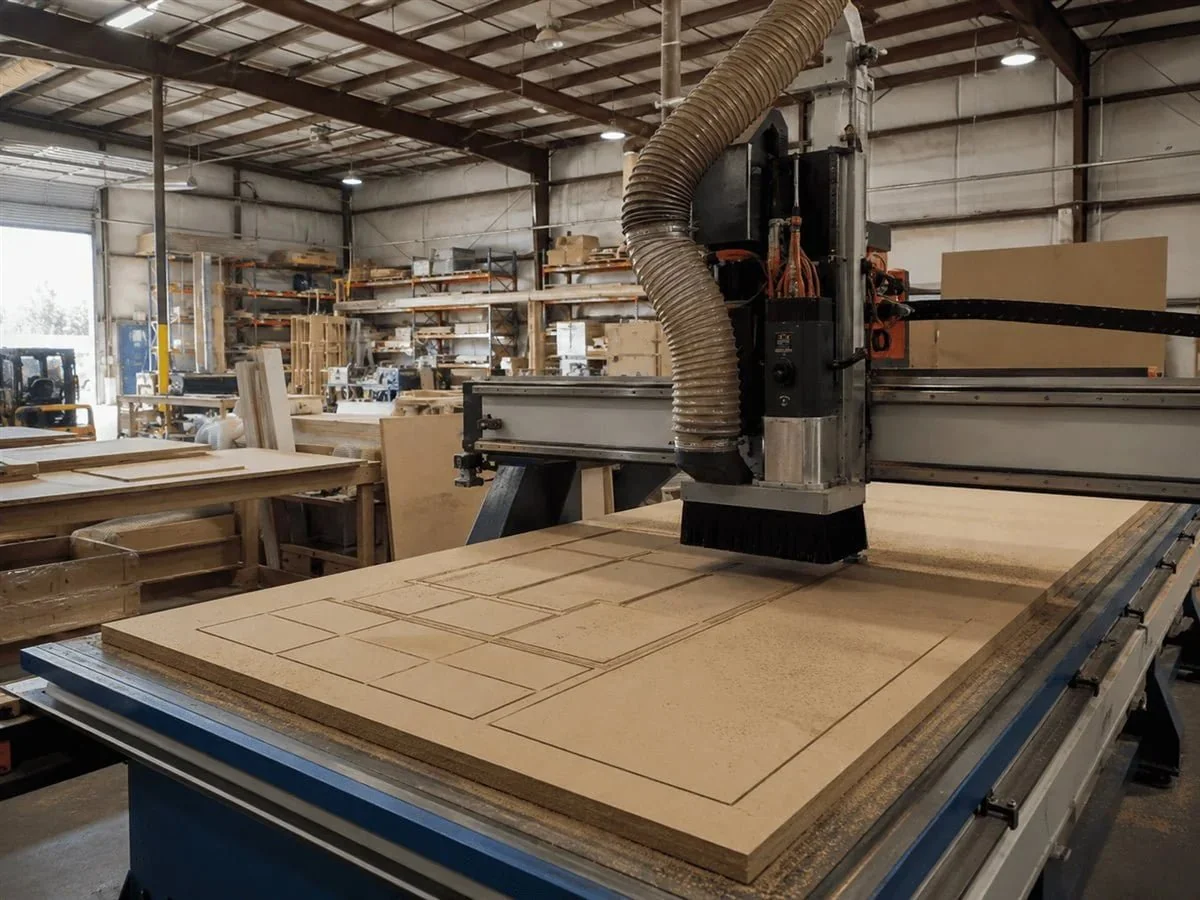
Workshop reference: CNC panel machining. The production method for each component follows the agreed design and material specification.
04. Surface Finishing & Painting
Surface preparation can include sanding, filling, edge treatment, and the application of specified paint, laminates, or other finishes. The target is an agreed appearance that can also withstand the planned packing, handling, and reuse.
Review color and sheen against the selected reference. Panel seams, transitions, and exposed edges deserve attention because lighting can make small differences more visible. A digitally smooth surface should not be treated as a promise of a completely seamless physical wall.
Allow the finishing process and handling requirements to influence the schedule. Packing before a finish is ready or protecting it with an unsuitable material can undermine earlier work.
Your approval point: Confirm finish samples and visible details before full production finishing. Any later substitution should be reviewed for appearance, cost, and timing.
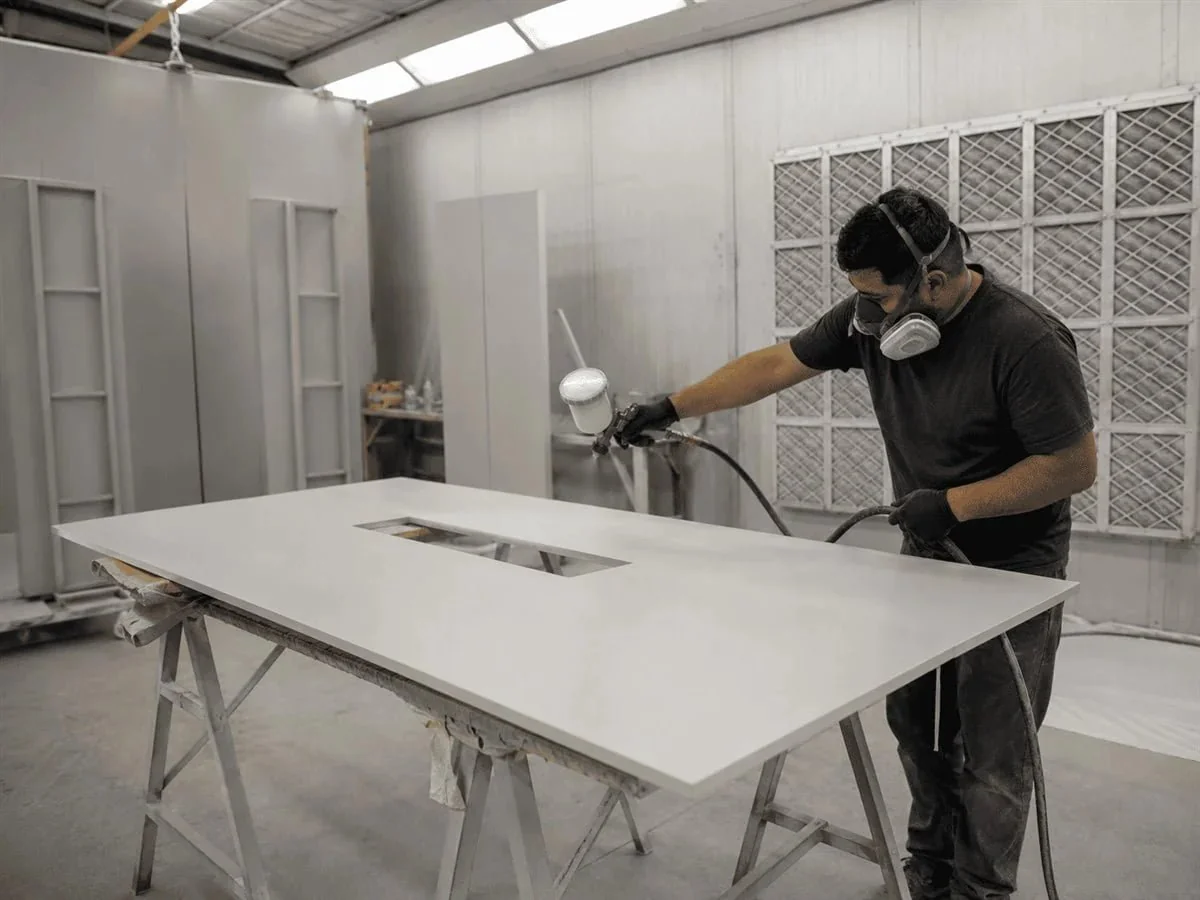
Finishing reference: painted panel preparation. Finish type and acceptance criteria should be documented for the project.
05. Graphics & AV Integration
Produce graphics from approved artwork matched to the actual display dimensions. Check image resolution, bleed, seams, logo placement, and orientation before printing. Fabric graphics, rigid panels, applied vinyl, and lightboxes have different fitting requirements.
Coordinate screen dimensions, mounting provisions, ventilation, equipment access, and cable routes with the component build. A monitor shown in a rendering does not establish the final model, bracket, or service connection. Confirm those details before closing walls or finishing counters.
Booth-mounted lighting and AV hardware are also separate from the event’s power service. Identify the equipment and power-location plan so the appropriate electrical provider can confirm the required service and installation arrangements.
Your approval point: Approve graphic proofs and equipment specifications. List who supplies each device, who tests it, and which items are fitted in the shop versus on site.
06. Pre-Show Assembly & Quality Check
Dry-fit components or assemble the agreed sections before shipping. This review can reveal alignment problems, difficult hardware access, graphic fit issues, or conflicts between furniture and equipment that are not obvious in a rendering.
Define the extent of the check in advance. A full booth assembly, a critical wall-and-counter connection test, and a visual component review provide different levels of verification. Shop space, project complexity, equipment availability, and scope affect what can be demonstrated.
Record issues with photographs or marked-up drawings and assign responsibility for correction. The final review should distinguish completed checks from functions that can only be tested after venue services are available.
Your approval point: Review the agreed inspection evidence and outstanding-item list. Confirm which issues must be closed before packing and which have a documented on-site completion plan.
07. Packing & Transportation
Prepare finished components for the actual journey and installation sequence. Protect vulnerable edges and surfaces, label parts to match assembly drawings, and organize hardware so the crew can identify what belongs together.
The shipment inventory should identify crates, skids, loose items, graphics, and accessories. Record packed dimensions and weights, receiving labels, delivery contacts, and any handling restrictions. Give the installation team access to the packing list and assembly information before move-in.
Choose advance warehouse or direct-to-show delivery by comparing the current event’s receiving dates, restrictions, handling arrangements, and installation needs. A booth’s island configuration does not determine its delivery route.
Your approval point: Confirm pickup readiness, receiving destination, delivery window, and the outbound or storage plan. Coordinate these details through the agreed exhibit transportation scope.
08. On-Site Installation & Dismantling
At move-in, the crew reconciles the delivered inventory with the installation plan and coordinates the build with available access and show services. Depending on the design, flooring, underfloor distribution, structures, graphics, and equipment have different sequencing dependencies.
Confirm who performs each task. Electrical work, rigging, material handling, and other designated services may involve separate authorized providers. The current exhibitor kit and written scope determine responsibilities; a booth builder’s installation package does not automatically include every show service.
Before handover, check the agreed functions, graphics, lighting, furniture, and remaining finish details. After the event, dismantling should preserve reusable components, document damage or missing items, and connect with repacking and outbound arrangements.
Your approval point: Confirm handover expectations and the return destination before the show. Review installation and dismantling services alongside the production plan, not only after freight has shipped.
Materials Used in Custom Booth Fabrication
Choose materials for the job each component must perform. Appearance matters, but so do weight, connection design, surface durability, repair options, and the number of planned shows. A material suited to a sign face may be unsuitable for a loaded shelf.
For a side-by-side comparison of construction options, read our trade show booth materials guide, covering wood, aluminum and hybrid approaches and their implications for cost, shipping and reuse.
| Material or System | Potential Application | Selection Question |
|---|---|---|
| Wood-based panels and millwork | Counters, walls, shelves, and storage components | What grade, thickness, support, and edge treatment does the detail require? |
| Metal frames and brackets | Structural frameworks, connections, and equipment supports | What loads, joining methods, finishes, and technical review are specified? |
| Aluminum extrusion systems | Modular framing and reusable exhibit components | Are connections, graphic channels, and future configurations compatible? |
| Printed fabric and SEG systems | Graphic walls, lightboxes, and replaceable branding | Do frame dimensions, tension, lighting, and artwork fit together? |
| Acrylic and other specified plastics | Display details, signs, and illuminated features | How will the part be supported, protected, cleaned, and replaced? |
| Paint, laminates, and applied finishes | Visible branded surfaces | How will sheen, seams, touch-ups, and transport wear be handled? |
Material names alone do not establish structural suitability or compliance with a show requirement. Confirm the specific product and any documentation required by the current event. Avoid approving a substitution solely because it looks similar in a photograph.
For repeated use, prioritize accessible connections, replaceable graphic surfaces, and practical component sizes. Review the next planned booth footprint before assuming an exhibit can be rearranged without additional fabrication.
How Long Does Custom Booth Fabrication Take?
There is no single fabrication lead time for every custom exhibit. The schedule depends on drawing readiness, technical approvals, material availability, finish processes, graphics, equipment integration, and the extent of pre-show assembly.
Work backward from the confirmed receiving and move-in dates, then identify the tasks that control the earliest possible ship date. Design development, freight planning, and service ordering can overlap, but final fabrication details cannot rely on unresolved product dimensions or unapproved finishes.
| Milestone | Information Needed to Set the Date |
|---|---|
| Production release | Approved scope, current drawings, material selections, and applicable approvals |
| Graphics release | Final dimensions, approved artwork, proofs, and production availability |
| Assembly review | Component readiness, equipment availability, and agreed test coverage |
| Pack and ship | Closed production issues, inventory, carrier arrangements, and receiving window |
| Installation readiness | Freight availability, site access, crew bookings, and required services |
Ask the builder to distinguish production time from the full project timeline. A fabrication estimate may exclude design revisions, outside approvals, or transit. Those activities still need space in the calendar.
If a decision changes after release, assess its effect on the remaining work before approving it. Moving a screen can change framing, cable access, graphic dimensions, and installation instructions. A small visual revision can therefore require more than a small shop adjustment.
What Affects Custom Booth Fabrication Costs?
Fabrication cost follows the work required, not just the square footage. Two 20×20 booths may have different component counts, finish standards, equipment provisions, packing requirements, and assembly effort.
The main variables are structural complexity, material and hardware choices, finish preparation, graphics, lighting and AV integration, pre-build coverage, and the handling demands of the finished components. Curves, concealed supports, and unusually large pieces can introduce work that is not obvious from a front-view rendering.
Compare alternatives at the component level. A modular wall with replaceable graphics, for example, serves a different production and reuse plan from a heavily finished custom feature. Neither option is automatically the better value; the decision should reflect the function, presentation, and intended show program.
Keep fabrication charges distinct from transportation, installation, and show-service charges when reviewing the estimate. Whether those services are included, coordinated, or separately ordered must be written into the proposal. For a line-by-line comparison, use the Custom Trade Show Booth Quote Guide.
Quality Control & Pre-Show Assembly
Quality control is most useful when it produces a clear record of what was checked and what still needs attention. It should cover the details that could prevent installation or affect the agreed appearance, with checks distributed through production rather than postponed until packing.
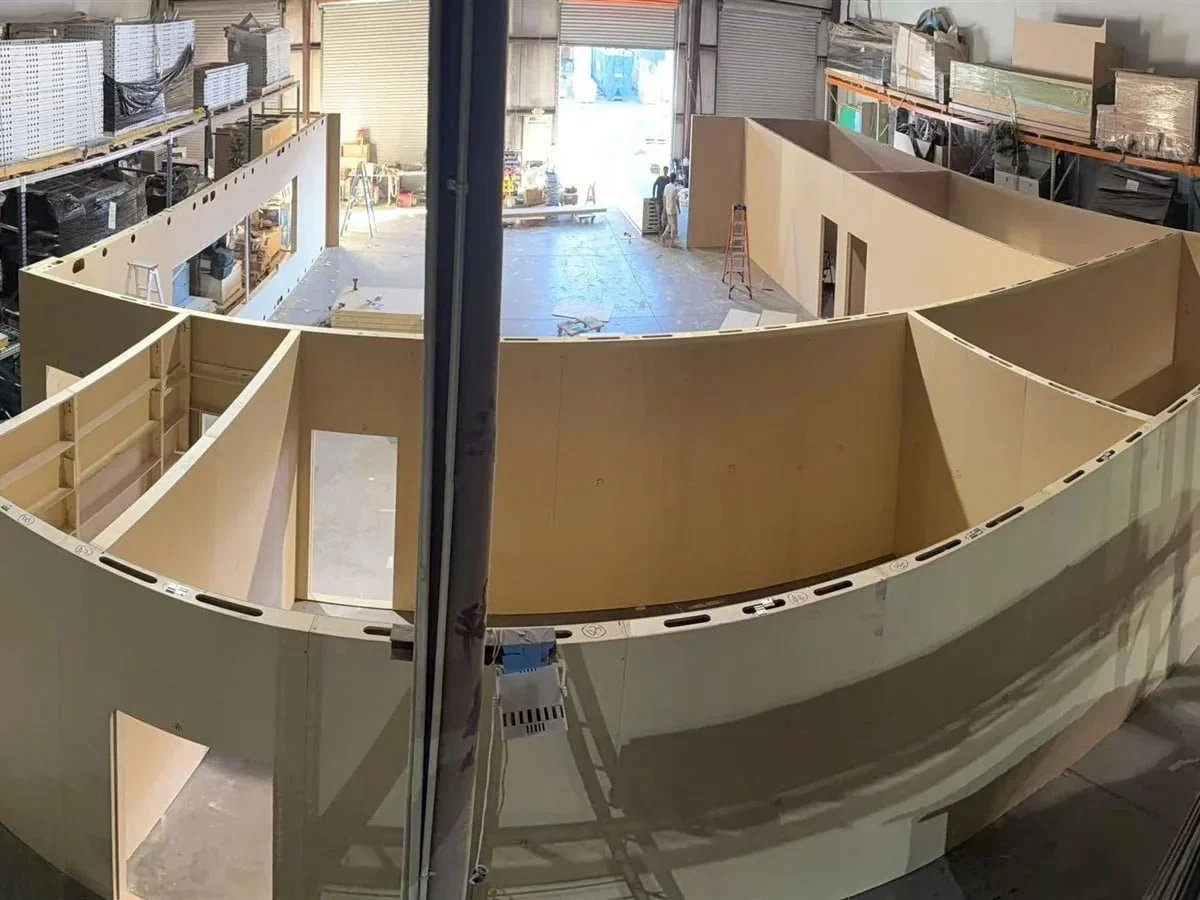
Workshop dry-fit reference. The scope of a pre-build should identify the sections assembled and the functions tested.
| Check | Evidence to Review |
|---|---|
| Dimensions and fit | Key measurements, mating sections, and connections against the current drawings |
| Visible finishes | Approved reference, panel edges, joints, and surfaces under representative lighting |
| Graphics | Correct artwork version, orientation, alignment, and fit on the intended surface |
| Hardware and access | Accessible fasteners, operating doors, removable panels, and equipment access |
| Lighting and AV provisions | Specified mounts, cable routes, and the functions included in the test |
| Installation handoff | Part labels, assembly sequence, inventory, and a closed or assigned issue list |
A shop review cannot reproduce every venue condition. Power service, network access, rigging, and the final operating environment may need additional checks on site. Document those remaining checks so a passed pre-build is not mistaken for complete show-site commissioning.
Real Custom Booth Fabrication Examples
The following published projects show how exhibit components, graphics, and display functions come together. The workshop photographs above illustrate production capabilities; they are not presented as construction records for these particular projects.
ZIG·ZAG — NACS 2021 — 20×20 — Chicago
The ZIG·ZAG project record lists fabrication, graphic production, pre-show assembly, transportation, and installation within a custom-and-rental exhibit scope. The design organized separate brand areas with wood-look surfaces, shelving, and counters.
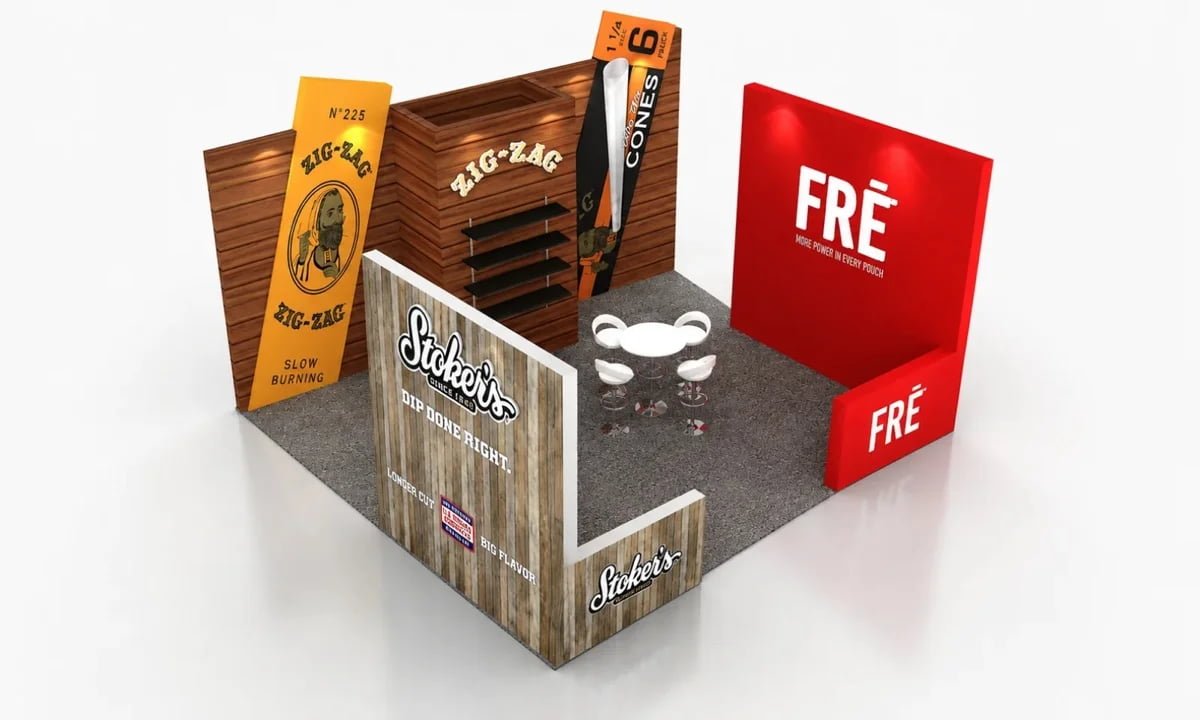
3D rendering published in the ZIG·ZAG case study.

Completed-booth view published in the same case study. The views show different angles, rather than a promise of identical rendering and photographic appearance.
Fabrication takeaway: Brand-panel placement, shelf fit, counter details, and finish transitions need to be resolved together. The wood-look appearance does not establish the underlying material. For a comparable footprint, explore 20×20 trade show booth configurations.
Klacci — ISC West 2024 — 20×30 — Las Vegas
The Klacci project record describes door-hardware demonstrations, product pedestals, reception, and meeting functions. Its recorded scope includes fabrication, graphics, pre-show assembly, and show-site installation alongside rental elements.
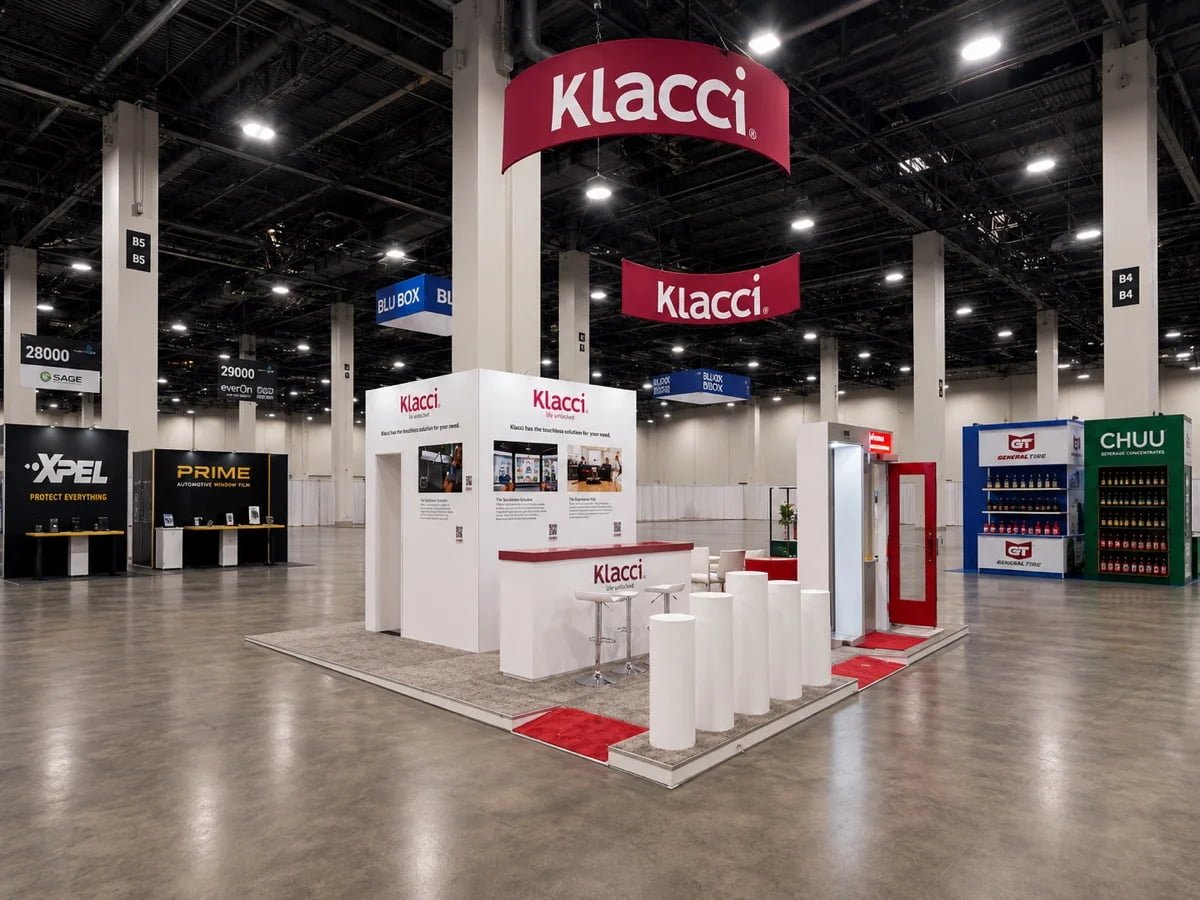
Completed-booth image published in the Klacci ISC West 2024 case study.
Fabrication takeaway: A working product display needs more than an attractive surround. For a similar door-hardware exhibit, verify the actual assembly dimensions, operating clearances, mounting needs, and access for servicing before producing the display fixtures. These are planning considerations, not claims about undocumented project tests.
Frequently Asked Questions
Can Exhibitsmax fabricate from another designer’s rendering?
Yes. Share the rendering, available dimensioned drawings, material references, and show requirements for review. Confirm permission to use the files. Additional production drawings or technical development may be needed before the concept can be released to the shop.
Can custom fabrication be combined with rental components?
Yes. Custom counters, product displays, graphics, or architectural details can be coordinated with suitable rental structures. Identify which components are custom-built, rented, reusable, or returned after the event, and check their dimensions and connections together.
Does every custom booth need a full pre-build?
No. The appropriate review may be a full assembly, selected component tests, or a focused dry-fit of critical connections. Agree on the coverage and evidence before production. A component inspection should not be described as a complete booth test.
Can graphics be changed after fabrication begins?
Sometimes. Changes depend on print status, surface dimensions, frame fit, and remaining time. A graphic-only revision may be straightforward before printing; a revised logo size or screen opening can also affect the structure. Request a documented cost and schedule review before proceeding.
Who handles electrical service and rigging?
Confirm the authorized providers in the current show’s exhibitor kit. The booth builder can coordinate equipment locations and installation dependencies, but coordination does not mean official services or their charges are included. Assign ordering and payment responsibilities in the project scope.
Get a Free Custom Booth Design & Quote
Share your show name, booth dimensions, design requirements, budget, and timeline with Exhibitsmax. Our Las Vegas team can review the design, fabrication, graphics, packing, and installation scope for your project.